Projects can be created by uploading a file and selecting Create project for upload or by selecting the New Project button.
When you upload a file, a project is automatically created.
New project via file upload
Follow the steps below to create a new project by uploading one or more files:
- Left-click on the application logo at the top left of the page to navigate to the workspace.
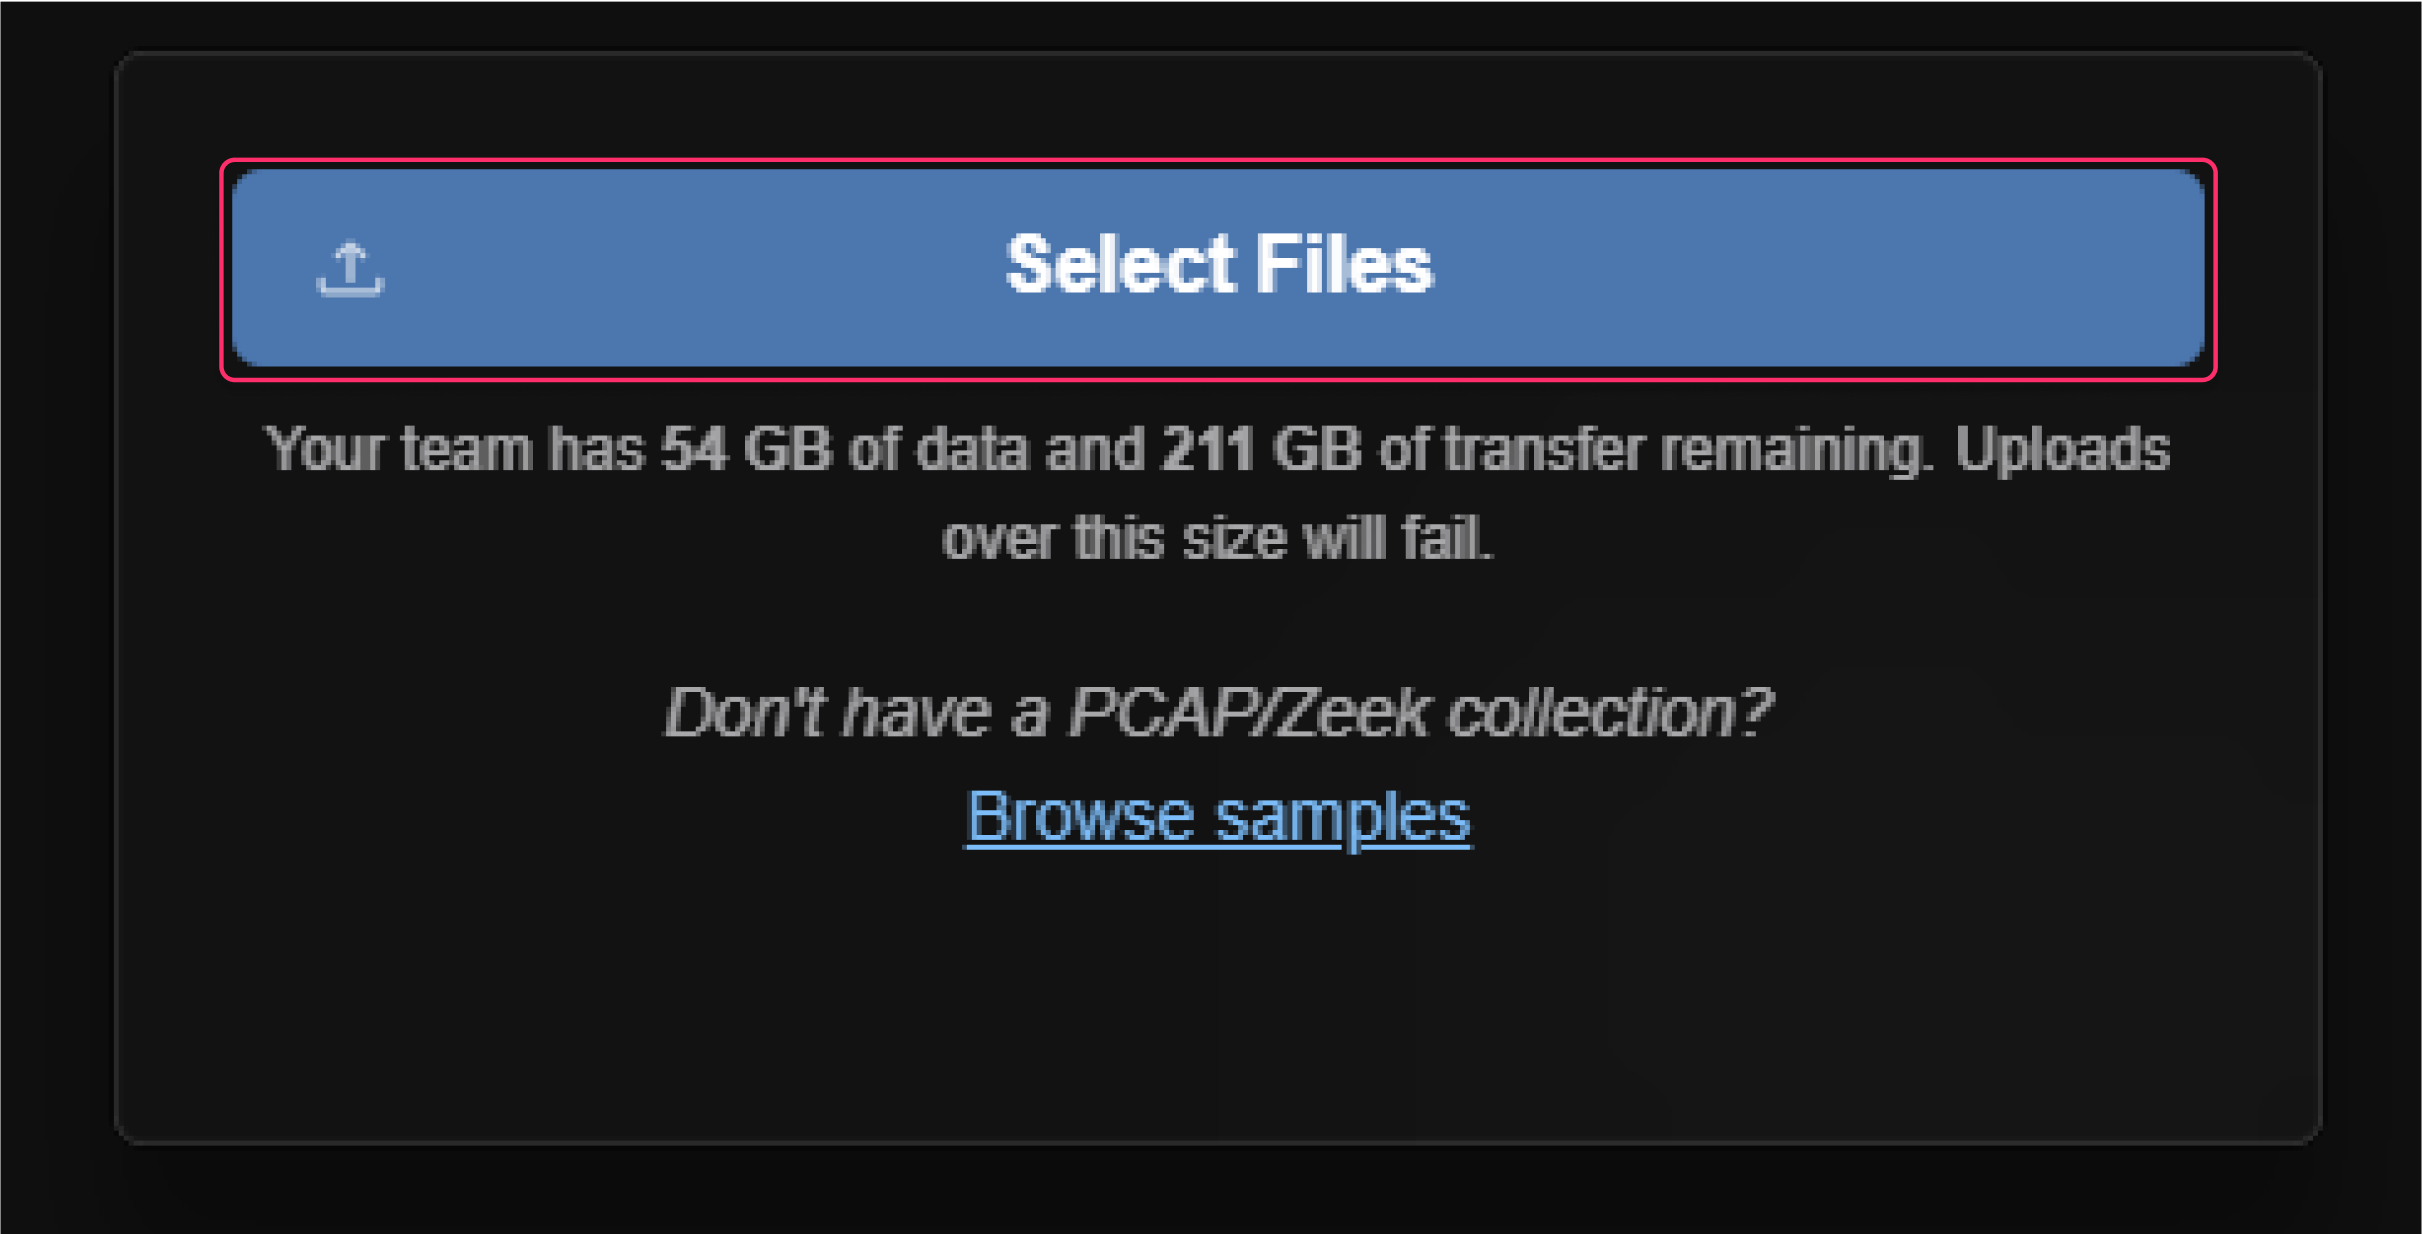
- Drag and drop a file into the workspace or select the New Upload button.
- Click on the Select Files button.
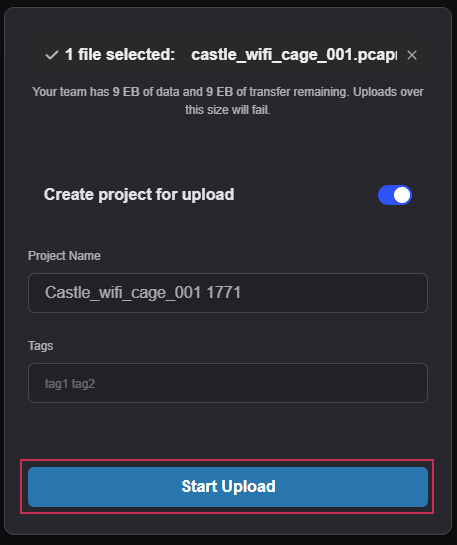
- Enable Create project for upload.
- Enter the desired Tags (space-separated values).
- Click on the Start Upload button.
The file upload process will now begin and a new Project will now be created. The uploaded file will appear within the Uploads section and will contain the date created as well as the size of the file.
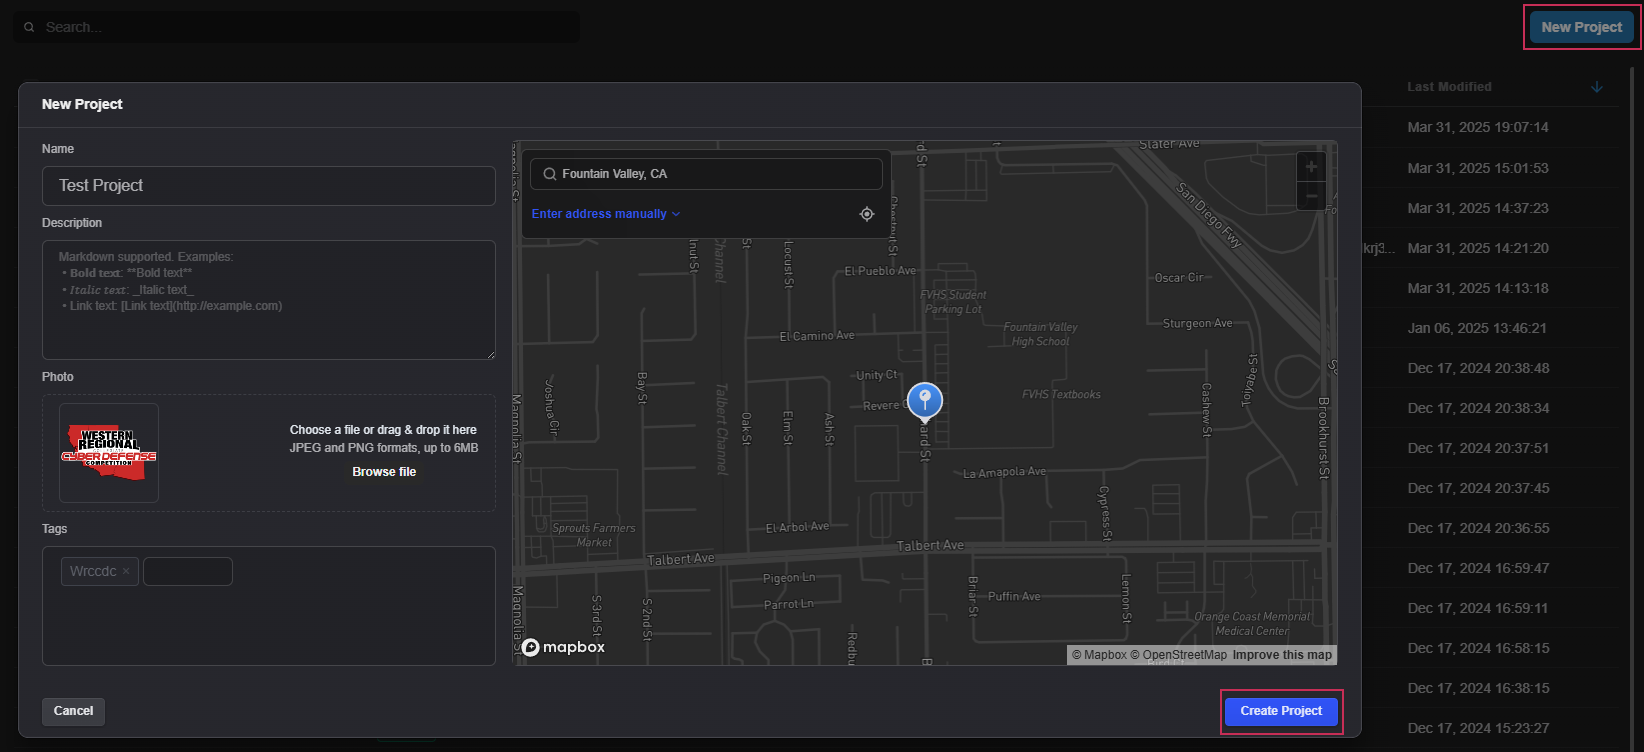
New Project button
When a project is creating by selecting the New Project button, the New Project dialog will appear. The dialog allows users to enter a variety of information about the project to include its physical location.
- Left-click on the New Project button.
- Enter the desired information.
- Select the Create Project button.
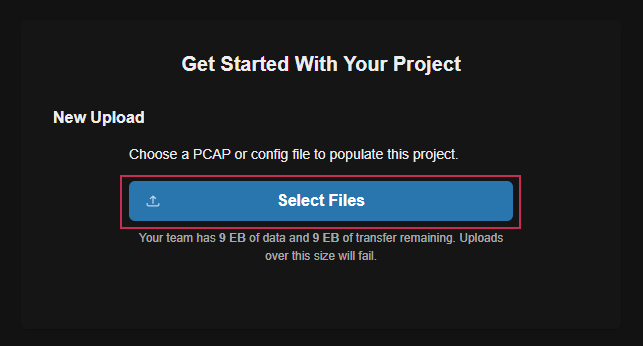
4. Select the Select Files button.
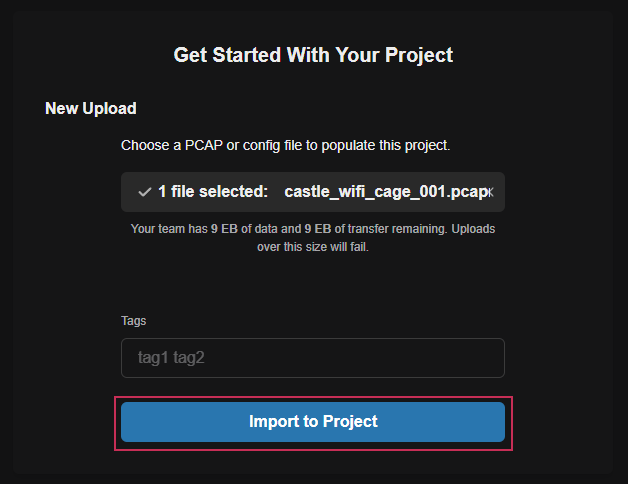
5. Select the Import to Project button.
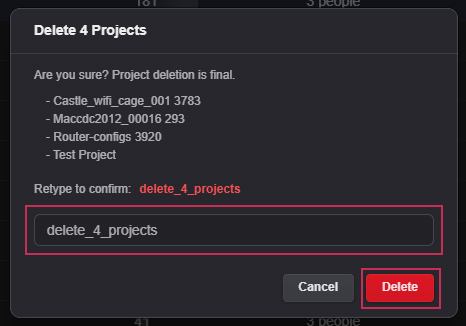
Deleting one or more projects
Follow the steps below to delete multiple uploads.
- Left-click on the checkboxes of one or more uploads.
- Select the Delete button.
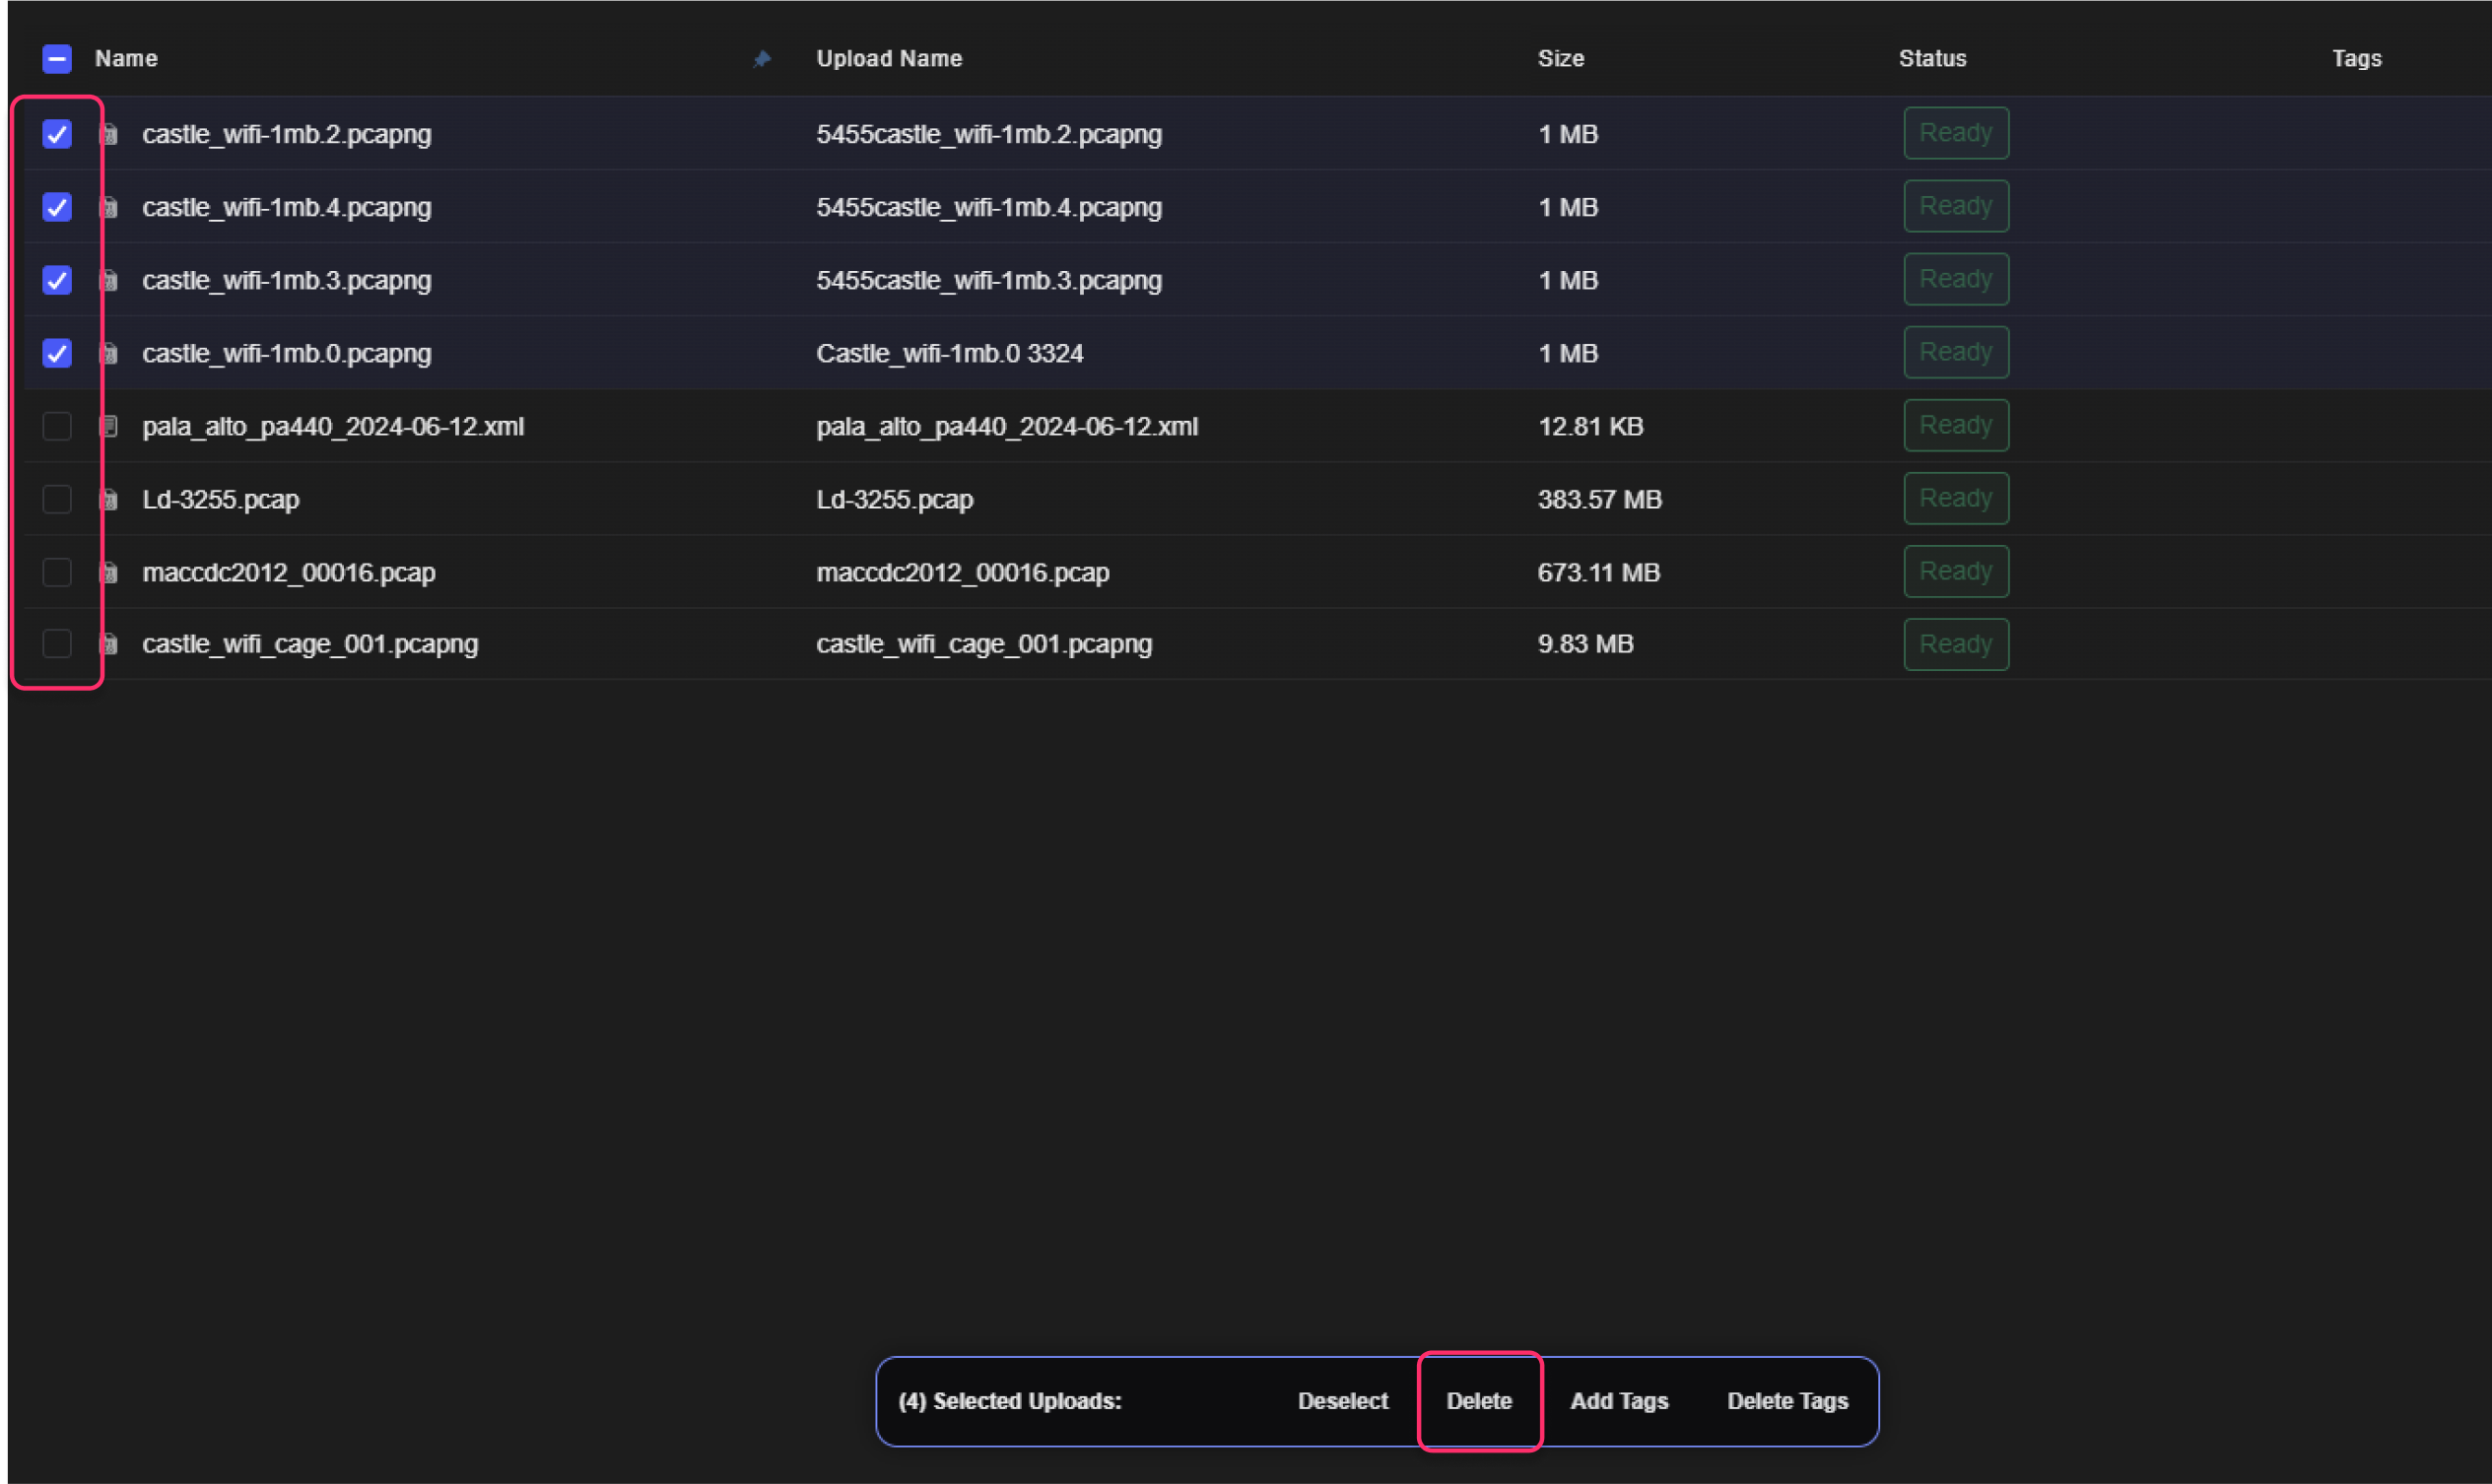
- Within the Delete Uploads dialog, enter the confirmation text.
- Select the Delete button.