Compressed archives are a great way to ingest multiple files into a single project. Archives may contain a collection of bro/zeek files, network collection files, or any combination of supported file types. Unsupported files within an archive will be ignored.
Linux / Mac
- Open a terminal window
- Navigate to the directory containing the target files
- Run the appropriate command for the target archive format:
# .bz2 (install: sudo apt install bzip2)
tar -cjSf <archive-name>.tar.bz2 <files>

# .tar.gz
tar -czvf <archive-name>.tar.gz <files>

# .tar
tar -cvSf <archive-name>.tar <files>

# .xz (install: sudo apt install xz-utils)
tar -cvJf <archive-name>.tar.xz <files>

# .zip (install: sudo apt install zip)
zip -r <archive-name>.zip <files>
Windows Zip
Windows supports .zip files natively.
- Select the target files in File Explorer
- Right-click and select Compress to ➜ ZIP File
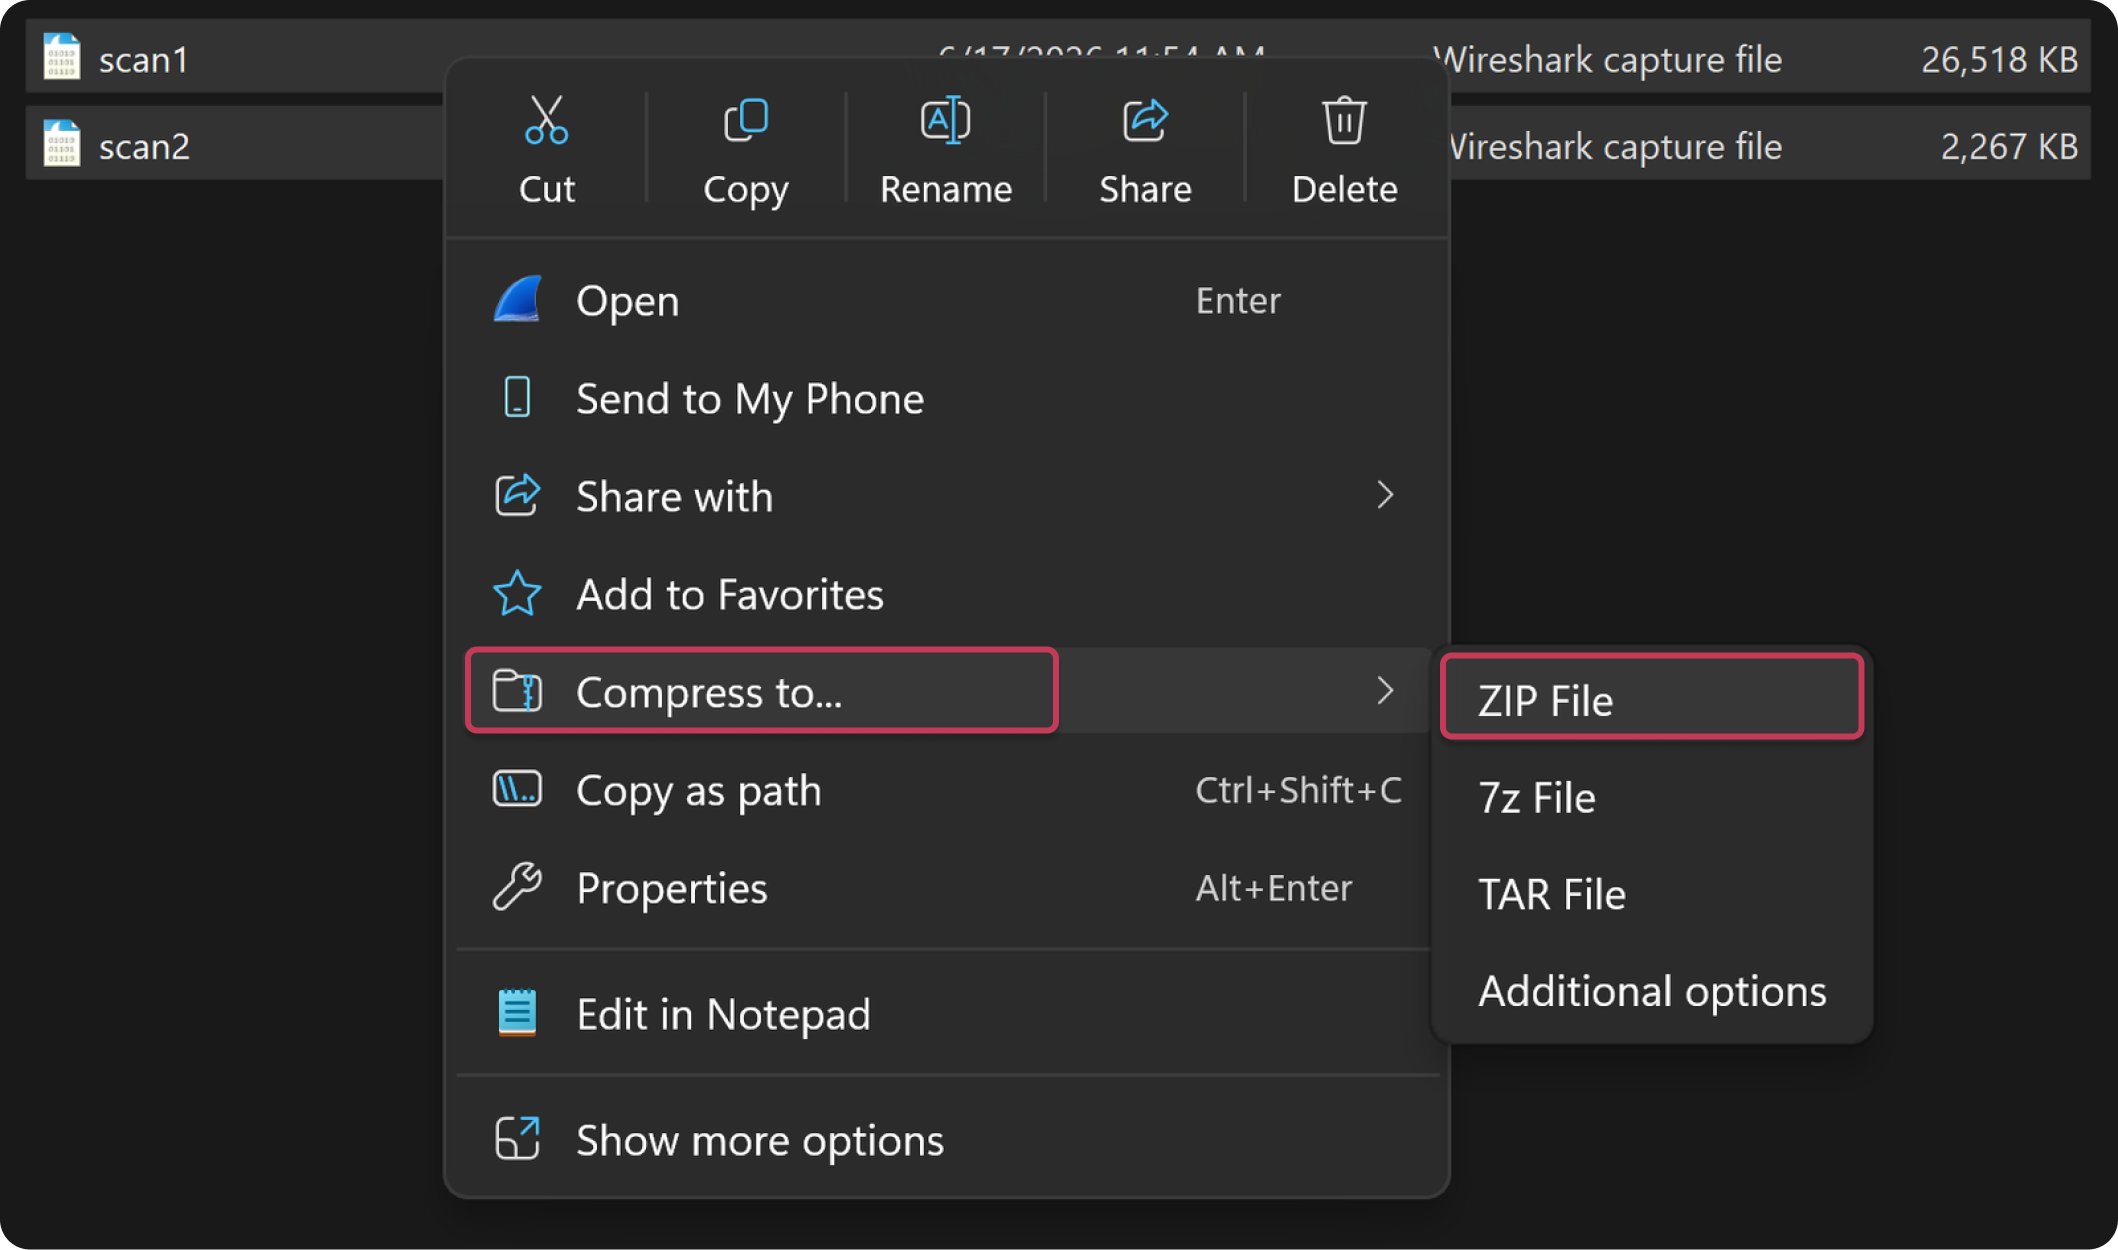
- Right-click the resulting .zip file to rename it if needed
Note: On some Windows 11 versions Compress to ZIP file may appear directly in the context menu. If neither option is visible, select Show more options to access the classic context menu.
Windows 7-zip
Windows 11 version 24H2 and later supports creating 7z and TAR archives natively in File Explorer without third-party software. 7-zip supports multiple archive formats (7z, bzip2, gzip, tar, wim, xz, zip). For older versions of Windows visit https://www.7-zip.org/ to install.
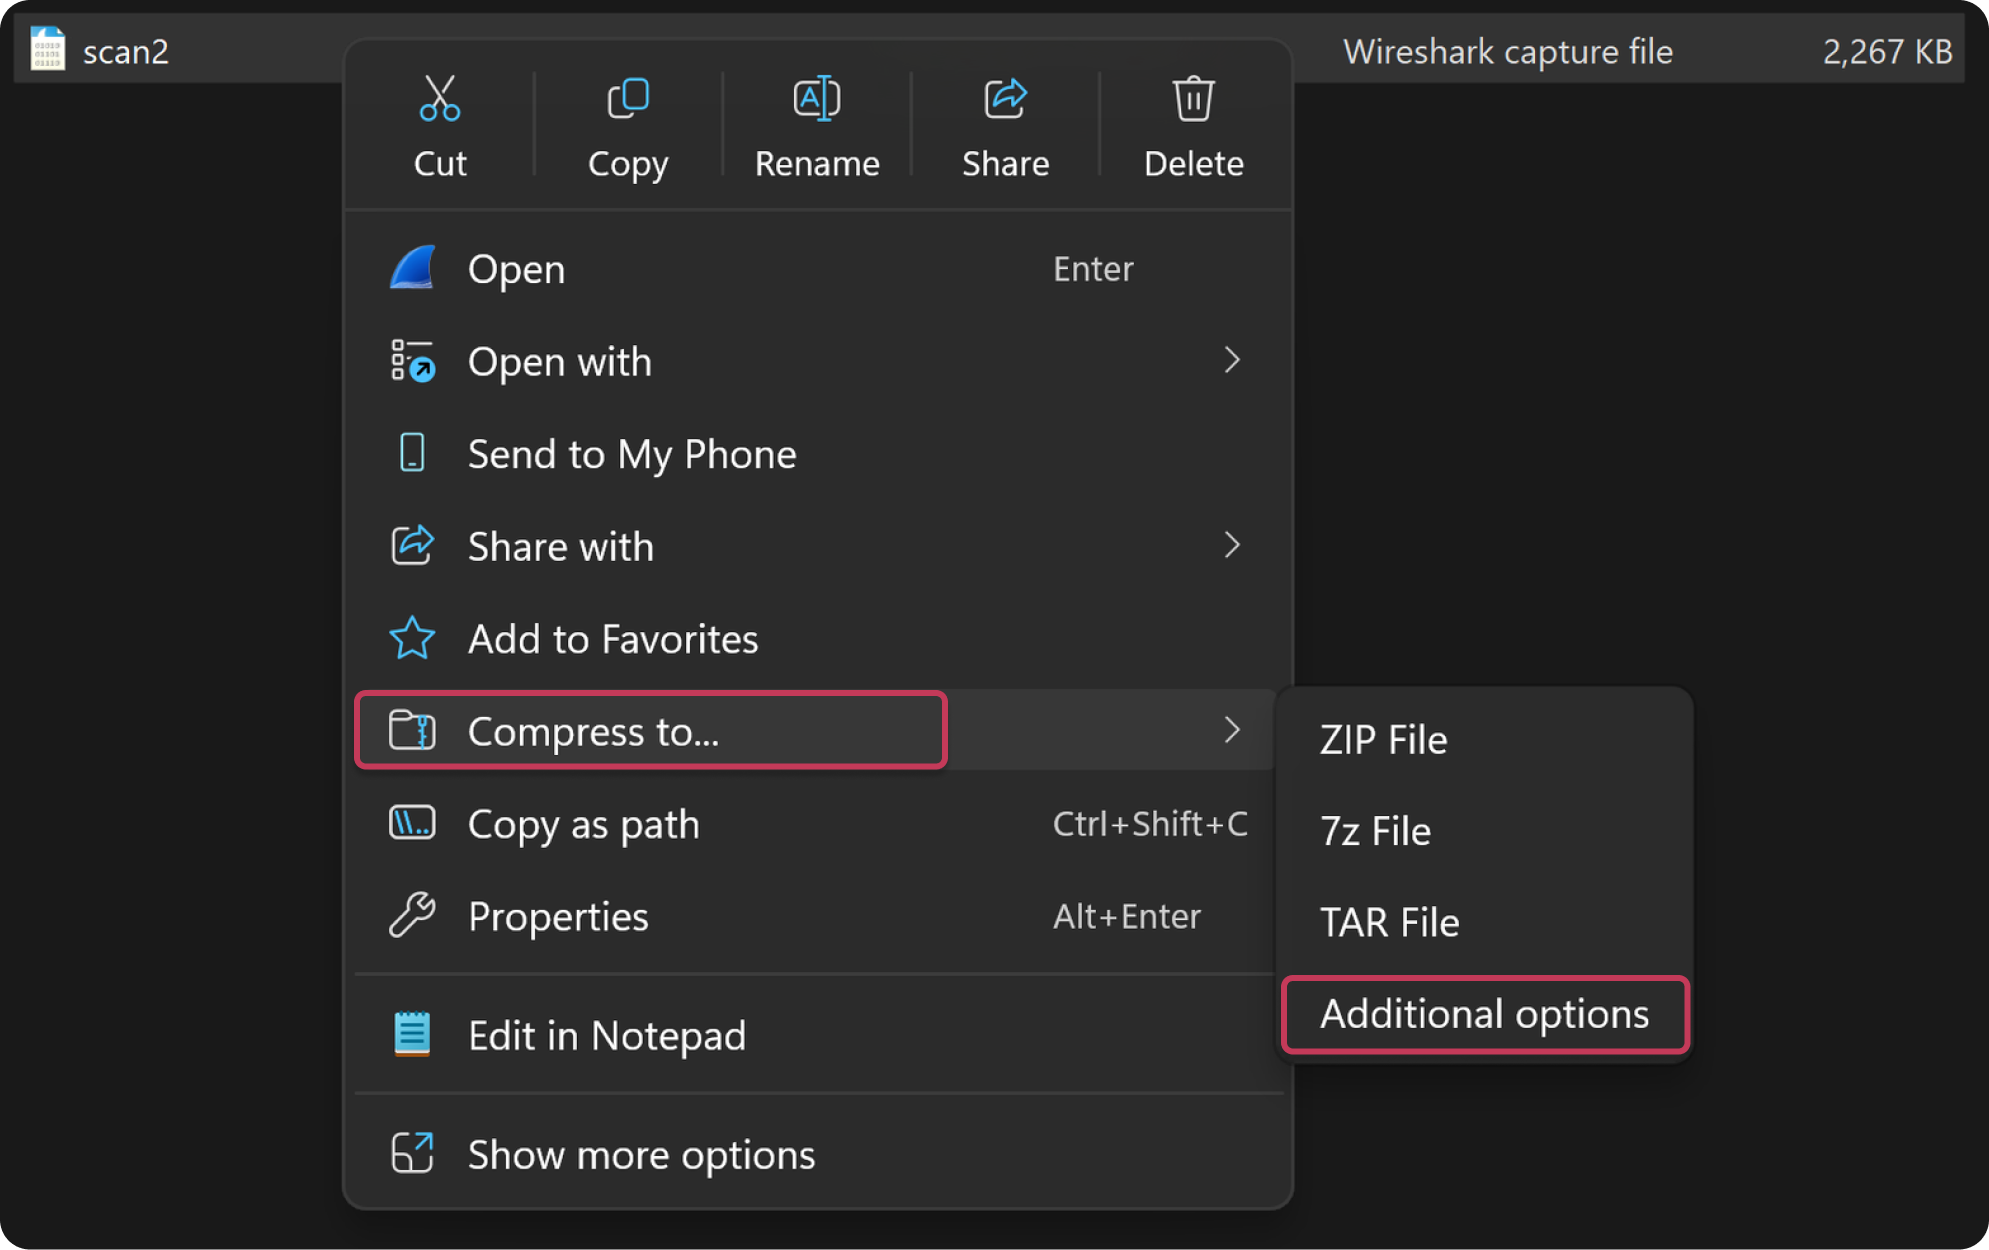
- Select the target files in File Explorer
- Right-click and select Compress to ➜ Additional options
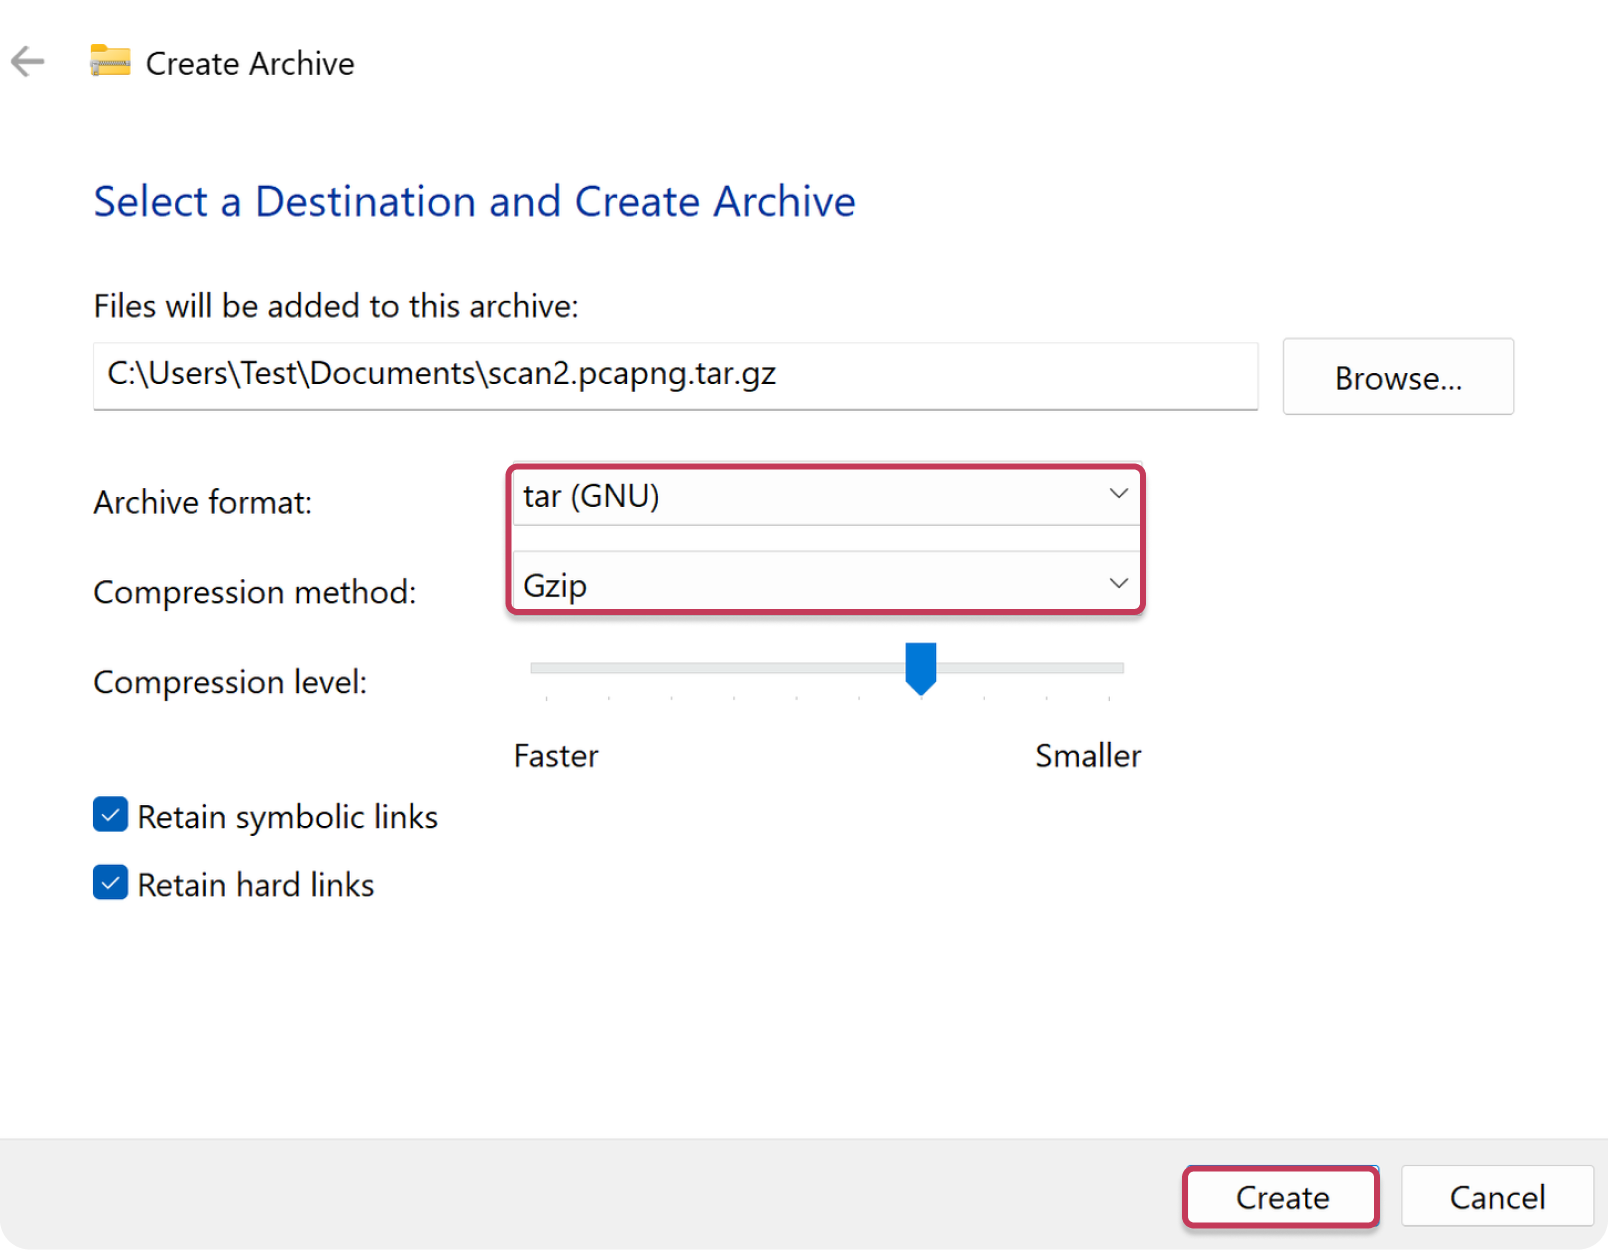
- Enter the save path and name for the archive
- From the Archive format dropdown, select tar (GNU)
- From the Compression method dropdown, select Gzip
- Select Create